LOL... not a problem man. It's OK to do that as a "how might it look" thing but it's not such a good idea if you want a good working map.
OK, it's a lot of info but maybe it will help...
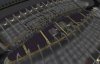
When I talk about collapsing all the meshes in the tutorial I was referring to a group of objects like several pipes, etc.. Not so much the whole map in a single shot. But that's ok, you just got a look at how it might look once everything is imported.
")
As best as you can, it's a good idea to import "chunks" as you call it, like all external walls that touch (ones that "touch" is the key word here). If the internal walls are joined with the external walls then go ahead and do those at the same time too. It's a matter of trial and error when it comes to doing a structure (walls/floors/roof) as an ASE file, remember it's not the best approach, but for a down and dirty VR it will do what is needed. In some cases geometry that overlaps in MAX might look OK in the Runtime if it is exported out together, other times it looks worse than if it was exported alone. Again, it's trial and error at first, but you will start to see a pattern in time as to what looks/works best.
Just try and break things down into related groups (but not MAX "groups", you know what I mean), once you have all of the sections of geometry for export it's a good idea to relocate the house center and ground elevation to the 0,0,0. This way when it's a static mesh in Unreal your insertion point is not way off in left field from the static mesh. Remember, Unreal does NOT use the object pivot point that MAX/VIZ uses, it only uses the MAX/VIZ 0,0,0 grid location as it's insertion point in Unreal. So, to relocate everything into a better position, you might want to select EVERYTHING in MAX, use the actual "group" command, use move and relocate the house to that 0,0,0, then when done you can "Ungroup" everything again. Now you have a near by insertion point (0,0,0) for Unreal.
Next simply select each chunk of geometry and use the "Export Selected" command to create the individual ASE files. Give them names that best relate to the "Chunks", not an easy task sometimes. I name them in MAX and then use that same name for the exported ASE file, that way I can come back later and I know what chunk relates to what ASE. Cool?
Last, to answer your question about placing the chunks in Unreal... yes, they will retain the position given in MAX if you place them in the Unreal Editor by right clicking (as you would a normal static mesh insertion) in the same spot each time in the editor. How I do this is I use the "Top" view port at full screen, I set the grid to something like 32 or 64, and then zoom all the way in as far as I can over Unreals 0,0 (it's a little thicker grid lines and a little darker, ya know?), once zoomed in you have what looks like a crosshair that you can right click on each time to insert each of the static meshes. I just keep the Static Mesh browser open and off to the side, selecting each item and right clicking to place it until they are all in. That way I know I'm hitting the same insertion point each time in Unreal.
EDITED:
Another good thing about working this way... as you find surfaces that don't look right in Unreal you can go back to MAX and work with that chunk of geometry to fix it, then export that ASE chunk again (instead of the whole map thing, less time that way). But remember to use the same name and replace/update the older ASE file, then re-import into Unreal. The real cool thing is that you don't have to insert it again into the scene, since once you replace it in the Static Mesh Pack and save it, the editor will display the updated chunk in your map. It's fixed.
Hey VITO!!! Do you know of a command line that we could be using to insert the Static Meshes into the same location, instead of doing it the way I have been doing it? *Fingers Crossed*