[UT]-Skinning : from Beginning to End

  • Two Factor Authentication is now available on BeyondUnreal Forums. To configure it, visit your Profile and look for the "Two Step Verification" option on the left side. We can send codes via email (may be slower) or you can set up any TOTP Authenticator app on your phone (Authy, Google Authenticator, etc) to deliver codes. It is highly recommended that you configure this to keep your account safe.
Status
Not open for further replies.

SaD

Skincollecting Fanatic
Sep 6, 2003
3,088
2
38
54
Germany
skincity.beyondunreal.com
Skinning for UT: from Beginning to End

Created by: Moose

Tutorial copied with the friendly permission from Identity Crisis .

Forward
For all those reading this let me start by saying thanks, and I hope you get the most out of what I have put together.

The information in this "handbook" is most of what I have gathered while skinning. You personally may not agree or do the same things I do, but everyone has their own way of working.

This was brought about from all those who have emailed me asking the question "Hey man, how the hell do I do this?" For all of you, I hope that after going through this you will be able to pump out some badass skins. This handbook does more than just tell you of how to physically make skins, but some tips and pointers to get yourself in the right state of mind, and ways to become a better artist or to improve your skins. The ideas I present are not the correct ones, but for me they work and if you give them a shot they could work for you too.

I know I wanted to put something else here.... ah well, on to the good stuff :)

Oh yeah, if you are an English teacher, or a English grammar master please forgive any errors.
 

SaD

Skincollecting Fanatic
Sep 6, 2003
3,088
2
38
54
Germany
skincity.beyondunreal.com
Chapter 1: Preparation

Programs
One of the most basic, and absolutely essential part of skinning is the software you use. There isn't a better program than the other, but more or less there are programs that are more powerful. Software can get hella expensive so if you really, really, really want Adobe Photoshop, be willing to shell out the bucks for it. There are all types of image editing packages out there that range in price. Here are a few things that you should keep in mind when looking for image editing software:

  • Does it allow for saving as 256 colour images? Note: if a package says it can save "web safe files" or *.gif files, then it can do this.
  • Can the package save PCX and BMP files? Most newer packages have this ability, check with the company if you are uncertain. MS Paint will not save PCX files (too my knowledge, heh, I'm on a Mac)
  • Does this package support layers? This isn't totally essential, but will come in handy.

If you answered yes to all those questions, and you have the cash, get the program, or ask your parent really nice.

Do you have no idea where to start when looking for software? Well here is a little list of apps that I recommend, and that a lot of skinners use:

  • Adobe Photoshop: Photoshop is an extremely powerful tool for digital imaging. I have been using this bad boy for a long time and I still don't know all you can do in it yet. It is kinda expensive ($609.00 through Adobe) but is very well worth it.
  • Corel Draw: I personally have never used Corel Draw so I can't comment on it too deeply. Read up on it on their site.
  • Corel Painter 6: I own this program as well.. And man is it wonderful. Are you a traditional artist who is kinda weary of going digital? Painter simulates (very well I may add) real life media such as pencils, chalk, oil pastels, paint, ink, water-colours, as well a ton of others. Each brush/media is open so that you can change everything about that brush. Ever want to know what it was like to blow charcoal through an airbrush? Painter 6 can do it. It is quite costly as well, but for $410 you can get Corel Painter 6 and KPT 6 (a pretty powerful filter program).
  • Jasc Paint Shop Pro: Psp was the first image editing software I used as a junior in high school. I must say I fell in love after that point and it is why I am where I am today. PSP is basically a less expensive ($110) version of Photoshop, minus some elements and plus some others.

There is undoubtedly more than just these image editing packages out there, but this should get you started.

Required/Recommended Files
In order to make skins, you need the UV mesh of the model you plan to skin. This is basically the frame for where you put all the art. They may be confusing to look at when you don't know what parts go where, so it is also a good idea to have a reference of the a skin from the game. Click on the link below to download the stock UT Skinmeshes (excluding Nali, Cow and Skaarj) that I have collected through the past couple of months.

Download skin meshes - 6.89MB

If you want to get other textures from UT, all that you have to do is load up Unreal Editor (in UnrealTournament\system folder). After you load it up, you want to load up a texture file through the texture browser. If you are using UEd 2, click on the button at the top that looks like a mountain scene and then click the open folder button in the window that pops up. Find the UTX you want to load (ex, soldierskins.UTX, fcomandoskins.UTX) and click open. All you do from there is right click on the icon and choose "export." Save the file where you wish and you are set. You can do this, but remember to just use them as reference (see Chapter 4). If you are using UEd 1, on the right is the Browser section, and all you have to do is click the Load button at the bottom and then right click and export.

PreSkinning / Ideas
Ahh this can be the most painful part of the skin. It can also be the most random and exciting part. You could have a BADASS idea that you just have to get out, and then again you could have no ideas at all. If you are in a block, here are some things you could try:

  • Sketching: probably one of the easiest ways to get ideas is to grab a pencil, a piece of paper and start doodling. Just let yourself go and draw. You don't have to draw people, just draw stuff and you will get some ideas.
  • Look at other skins and try to think of what you haven't seen yet. After looking at a bunch of skins and you have said to yourself, "Why the hell don't skinners ____?" Well now is your chance! do it!
 

SaD

Skincollecting Fanatic
Sep 6, 2003
3,088
2
38
54
Germany
skincity.beyondunreal.com
Chapter 2: Skinning skinning skinning

Working file sizes
You are not limited to file size when creating your skin. In the end however, the file does have to be a specific size. If you are planning on previewing your skin you must make the file the correct size.

When I work, I usually work at double size, and all of the meshes together in one file (when doing the stock UT models). This file ends up being 1024x1024 pixels. You can segment this by using the grid in your image editing software (if it supports it). In photoshop , go to the Preferences (Control + K) and then the Guides and grid section. Set the "Guideline every" setting to 256 pixels. You can also change the colour of the grid here too. Then, in your skin, go to View > Show > guides. If you work at 1024x1024 it will look slightly different than the one below, but the one below is sized to 512x512, thus the 4 sections.

Too many numbers? Well you do not have to work large. Working with large files lags some systems and some just cant handle it. There is nothing wrong with working at 256x256 (the size for UT skin files) you just have less pixels for detail.

The meshes
Below is an example of the skin mesh. This is a version where all 4 parts of the skin are put together in one, 512x512 image. I usually work like this so I can see the whole skin as I go along. These meshes may seem cryptic and confusing at first, but you can always make marks on the areas then preview the skin to see what goes where. The stock UT models are mapped very well and it is generally easy to tell what is what. You can also look at the reference skin files you exported from Unreal Ed to see what is what.

If you need the meshes for the stock UT characters, you can download them here.


Click to enlarge​

Seams, wrapping, and stretching
One of the most frustrating parts of skinning and doing character textures is making the skin "seamless." What this means is that you cannot tell where the model is mapped from the colours in the texture.

Each edge of the UV mesh will meet up with another edge. In order to make your skin seamless, you must find out where the edges meet and make sure the colours are exactly the same on either side, or the detail lines up right. This can get very tricky and frustrating, but in the end it is worth it.

Another concept to be aware of is how textures wrap around the model. When you do the skin, you are basically doing the art as it would exist three dimensionally, but flat. It would be like if you cut your face off at the bottom of the jaw all the way up to the top of your forehead and layered your skin out flat, while keeping all the colours the same. It is most apparent in the arms, where you have to do the biceps and right next to is is the elbow and triceps. Once you can get your head in "flat 3d mode" you will be well on your way.

One last pain in the ass of skinning is stretching. Some areas on the models will stretch and make areas larger or smaller than what you do in the texture. This is just due to the UV mapping, and you gotta live with it. Kinda like those people who drive in the left lane going 60 in a 70 mph speed limit... you can't get rid of them, so you just gotta deal with it :)

Techniques

Setting up your texture file
I like to work with my UV mesh as the top layer, and have it set to 'Screen' (See image below) in the blending mode. NOTE: The mesh must be black and white first. If it is gray, all you have to do is adjust the levels of the mesh. In photoshop, go to Image > Adjust > Levels (or CONTROL+L) and bring the slider on the left (dark values) past the vertical black line in the box above it. What this does is make that line (which represents a colour from your image's histogram) the darkest value in the image. Then you can set it to screen. Otherwise, you will get a slight colour shift every time you turn the mesh layer on or off. You can then create a new layer underneath this mesh and paint under the mesh, making it always visible. You can turn it off after you have the layout of the area done, and use it just to check seams and areas for shading/lighting.

screen.jpg


I would love to go through each part of a model and show "how to skin it," but everyone does work differently. My way may be different than most people out there, and I personally like that. I will be adding new techniques, so check there for them as they crop up (in the tutorials section).

As for techniques, there are more than what I would like to put here. If you would like to read up on the technique-y tutorials I have at Identity Crisis, have a look at it :)
Below are links to the ones I have done so far:

Colour mixing 3/3/00
Cloth 3/3/00
Metal (bang your head!) 2/16/01
Photoshop Actions tutorial 2/16/01
Faces!!!

Different Faces, team colours, and talk icons
So you are done with your skin and you just want to get it out to the public. How about adding some bells and whistles first? Do 3 more faces for your skin, the public will like your skin all the more if you have more faces. I will show ya how to code the INT file in the next chapter for multiple faces.

Other important things to add to make your skin better are Team colours and the talk icon. Team colours will vary from skin to skin, but unless you don't want people to play Capture the Flag or domination, don't include team colours. Now, this will not get you extra points with the public... so make sure you do the team colours. Be creative with them, you can do new skin parts for each team colour that represents the colour (how the Warboss and Xan2 skins are). The talk icon is pretty important as well. This is just a 64x64 bitmap of the character's face that will appear when you talk Ingame.
 

SaD

Skincollecting Fanatic
Sep 6, 2003
3,088
2
38
54
Germany
skincity.beyondunreal.com
Chapter 3: Saving and Importing

Are you finished?
Do you really think you are done? Before you get all ansy, let the skin set for about 2 days. Go do something else but skinning in that time period. Then, after the 2 days look at your skin again and you will notice things that you want to change. If you are 100 % happy with what you have then proceed.

File Dimensions
Each texture file must be 256x256 pixels. If you were working at 1024x1024, you must size that file down to 512x512, then with using the grid set to show every 256 pixels (Chapter 1) you can crop with accuracy. Save your file as something else at this point, and then crop each corner down to its individual 256x256 part.

Talk icon must be 64x64 pixels.

Colour depth
You MUST make the texture files have 256 colours. There are 2 ways of doing this.

The first way involves making the image indexed colour, then saving it as the PCX file.

The second method is a little convoluted, but I use this one just to be safe. First, save the file as a *.gif image with 256 colours (even the talk icon). After you save every file for your skin, close the main skin files and open all of the gifs. Now save them as PCX files. This is a little roundabout, but I have found it to work the best for me. This is also a great place to practice your action writing skillz... you can read my actions tutorial here.

The most important thing to remember is 256 colours.

File Types
The correct file type for saving the textures is PCX. All you have to do to save as a PCX is change the file type from the save dialogue box (if the software supports PCX). If your image editing software cannot save as a PCX... then you can't import the skin.

The talk texture icons must be saved as a bitmap (BMP).

File Names
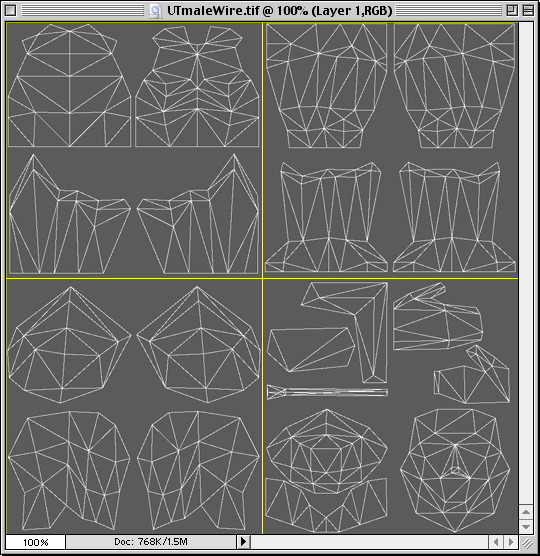
Naming the files is THE MOST IMPORTANT PART! if you are working in the 1024x1024 files I have here to download, the order goes from left to right, top to bottom (counter clockwise). So the top left file would be 1. The file to the right of it would be 2. The file directly under 1 is 3, and the file to the right of 3 is 4. The talk texture's number is 5.

The file names also must only be 4 letters long, not including the number (xxxx#.pcx)

gunn1.pcx
gunn2.pcx
gunn3.pcx
etc...

Team colours also require naming conventions. If the team colours are located on files 1 and 2, then you would have to save 4 more files for 1 and 2 in addition to the non team colour one. The teams also have specific numbers as well. Red is 0, blue is 1, green is 2, and gold is 3. Below is an example of correctly named files:

gunn1.pcx
gunn1t_0.pcx
gunn1t_1.pcx
gunn1t_2.pcx
gunn1t_3.pcx

The talk texture is numbered 5 (gunn5.bmp) and can also have team colours. This involves a little extra coding later but its worth it. Details are good!!

For each new face you make, you must make a new texture for it, as well as one for the main face. Say you have 4 total faces for your character. Here is how the files need to be saved:

gunn4.pcx
gunn4_helga.pcx
gunn4_olga.pcx
gunn4_slut.pcx
gunn4_juan.pcx

The same thing must be done for the talk textures too. Notice that there are 5 files listed. The one without a name is just there, and the others are so their names appear in the Face dropdown menu and you are able to choose them.

Importing to Unreal Ed
Open the texture browser. If you are in UnrealEd 2, go to File > Import. If you are in UnrealEd 1, at the bottom there is a Import button.

Find all the files and select all the PCX files and click open. You will get a box that has three text fields. In the first one (package name) enter some text, any words will do. Under category don't put anything, and then for the PCX files, check the "Generate Mini maps" button. Click "OK to all" and you should see all your texture files in the texture browser. Now if they look like they got hit by the fruity patrol, and are all colourful static.. You screwed up some where in saving the file at 256 colours (its happened to me too many times :\ ). If by chance you did the first method of saving files above, then try the other method. Do the same thing for importing the face icon (BMP) but do not check the generate mini maps box (un check).

After you get all the files imported, click save and name the file. There are specific naming conventions:

* the <name> is where you insert your skin name

Model ............Name
Male Soldier SoldierSkins_<name>.UTX
Male Commando CommandoSkins_<name>.UTX
Female Soldier SGirlSkins_<name>.UTX
Female Commando FCommando_<name>.UTX

After you save your file, move on to the int.

Making the INT file
This may seem like the most terrible thing in the world, but it really isn't. You need to make the INT so that UT knows that you have a new skin to put on its model. Below is an example, and it is explained below it.

[Public]
Object=(Name=SGirlSkins_Gunner.gunn1,Class=Texture,Description="WFUTGunner")
Object=(Name=SGirlSkins_Gunner.gunn2,Class=Texture)
Object=(Name=SGirlSkins_Gunner.gunn3,Class=Texture)
Object=(Name=SGirlSkins_Gunner.gunn4,Class=Texture)
Object=(Name=SGirlSkins_Gunner.gunn4_helga,Class=Texture,Description="Helga")
Object=(Name=SGirlSkins_Gunner.gunn4_olga,Class=Texture,Description="Olga")
Object=(Name=SGirlSkins_Gunner.gunn4_slut,Class=Texture,Description="Slut")
Object=(Name=SGirlSkins_Gunner.gunn4_juanica,Class=Texture,Description="Juan")
Object=(Name=SGirlSkins_Gunner.gunn5_helga,Class=Texture)
Object=(Name=SGirlSkins_Gunner.gunn5_olga,Class=Texture)
Object=(Name=SGirlSkins_Gunner.gunn5_slut,Class=Texture)
Object=(Name=SGirlSkins_Gunner.gunn5_juanica,Class=Texture)
Object=(Name=SGirlSkins_Gunner.gunn1T_0,Class=Texture)
Object=(Name=SGirlSkins_Gunner.gunn1T_1,Class=Texture)
Object=(Name=SGirlSkins_Gunner.gunn1T_2,Class=Texture)
Object=(Name=SGirlSkins_Gunner.gunn1T_3,Class=Texture)
Object=(Name=SGirlSkins_Gunner.gunn2T_0,Class=Texture)
Object=(Name=SGirlSkins_Gunner.gunn2T_1,Class=Texture)
Object=(Name=SGirlSkins_Gunner.gunn2T_2,Class=Texture)
Object=(Name=SGirlSkins_Gunner.gunn2T_3,Class=Texture)

The Name attribute MUST be the exact name of your texture file. After that, a period is placed and the first file of your skin.

<texturename> . <filename>

The class is always equal to Texture. The description attribute is only in the first element (1) and for each new face you make (4). This tells UT to put the text you enter into the dropdown menu and let someone choose it.

Third party Skinmakers
Was this hell or what?? Do you not feel like doing that every time you make a new skin? Well there are a couple of 3rd party skin packaging apps out there that will do all of it for ya.

The one I started using for a while was Skinmaker. You can download that handy little app at UTilities.

I know there are others out there, and my apology's to the authors of the other progs, but Skinmaker is the only one I know about.
 
Last edited:

SaD

Skincollecting Fanatic
Sep 6, 2003
3,088
2
38
54
Germany
skincity.beyondunreal.com
Chapter 4: Submission

Don't be shy!
If you make a skin and you are really proud of it, don't be shy, get it out to the public so everyone can marvel at its greatness! One of the most gratifying thing about skinning is reading a good review, or receiving and Email from someone who loves your skin. If there is one proper time to show off, now is it, so do it!

Skinning Honesty
If you rework another artist's work (stock skins, or other custom skins) BE SURE TO GIVE THE ARTIST CREDIT. You MUST say that you reworked so and so's whatchamahig skin. To not do so is low, immoral, and plain out stealing. Give credit to the artist, it will save you MANY flame Email's and forum posts, and it will give you a good image in the skinning community. Just think about it, if you stole some of Rorshach's or Rog[666]'s skins and called them your own, not only would they probably get pissed off, but everyone who loves and worships them will be pissed at you too. You don't want to upset the mob.

Packaging and Read me files
With every skin you do, you should always include a ReadMe file in the .Zip file you submit your UTX and INT in. I recommend that you put the UTX and INT in over a Umod file because not everyone can install Umod (or know how) files successfully. Having the UTX and INT alleviates many problems.

The read me should be sweet and too the point. You want to include your name, alias, Email address, website, name of skin, model used (author's name of the model if a custom model with Email and web information for them too) installation instructions, team colour information, number of faces, and legal info. Other stuff you can add if you feel like it are: estimated time taken to make the skin, programs used, a story, screenshots, and thank you's Think of the read me as containing everything you want the person to know about the skin and brief author information.

Places to submit
There are SOOOOOOO many UT skin sites out there, it would be impossible for me to list them all here. Your best bet is to hunt around on all UT sites and look at every one that has skins, and will accept submissions. Here are a few sites to get you started:


Another great place to go to are message boards. Identity Crisis has a great skinning forum, as does Polycount, EpicKnights, and Skindom , just to name a few. When you find a site that accepts skins, check and see if they have a message board and go pimp yourself.

The Public: Constructive Criticism vs Flaming
The Public can be your worst enemy and your best friend at the same time. Not everyone is going to like your skin. I promise you this. You need to be open to people's opinions and be able to accept the fact that some people just will not like your work. Here are a few things to remember when reading critiques of your work:

  • Keep an open mind. If someone says "Dude, that ****in skin sucks my nuts! how long did that take you, 2 minutes? Christ, I have seen better skins done by a 4 year old, realise that that person is a jackass and ignore what they have to say. That is what is called flaming, not critiquing your work. Constructive criticism is when someone doesn't like what they see and they offer suggestions to fixing that problem, or give reasons for their disgust.
  • Keep your cool. If someone starts flaming you, don't flame them back, it only makes you look like a jack ass too.
  • Don't get big headed. If you post your skin on a message board and you get 39 replies that are all positive, don't go thinking you are the granddaddy of skinning and all who walk shall bow at your feet and kiss your holy footsteps. You can always get better, never think you are perfect.
  • Be courteous. If someone compliments your work, thank them.

There are many other things that are good to remember, but the main thing is self control and politeness.
 
Last edited:

SaD

Skincollecting Fanatic
Sep 6, 2003
3,088
2
38
54
Germany
skincity.beyondunreal.com
Chapter 5: Criticising your work

One of the only ways you are going to get better as a skinner is when you have the ability to look at what you have done and find something, anything, that you can improve upon for your next skin. In doing this, you are able to find your flaws and improve upon them thus making them not your flaws anymore, but your strengths.

If you are working on a skin for a week straight and you finally finish it, don't make the UTX and INT and submit it that night. Come back to it in a day or so and you will find things you did not know were there. If you get your mind off of it for a while you will realise that you made a few errors (like what I am going to be doing tomorrow when I reread this :).

Show your work to other people before you finish. When you post a thread on a message board, don't just say "Uh, this is my new skin." You need to tell the people you want comments and feed back as to what you can do to make it better. Other people will find things you never knew existed. One of the best judges out there is a person who has never seen your skin before, so put 'em to work!

Chapter 6: Places to get help

If you ever need a someone else's eye, go to message boards and ask for comments. Ask your friends for advise or comments. Use the people around you, their knowledge can help you make your work even better than it is.
 

SaD

Skincollecting Fanatic
Sep 6, 2003
3,088
2
38
54
Germany
skincity.beyondunreal.com
Outro

Well, I hope that you have gotten enough out of this to go and make your own badass skins for the UT community to see. In case I missed something or you have more questions, please Email me and let me know.

On another note, do not limit your self to just Unreal Tournament skinning. Try skinning for Quake 3 Arena or Half-Life. Sure you may not want to be a traitor and go to the side of Q3A, but there are definite learning possibilities there.

For example, Quake 3 uses a different method of packaging the skins. They are stored in .pk3 files, which are just .Zip files with the extension renamed. Inside the pk3 file you include 32 bit (yes 32 bit, not the 8 bit, 256 colour textures of UT) Targa or .TGA files. Some of the meshes are a bit smaller than what you may be used to with UT, but that is where you learn to change your style. For all of the Q3A model meshes, you can download them here. In addition to the 32 bit splendour of Q3A, it also supports Alpha channel masking and shaders. The shaders are what make the sweet looking glowing effects, and glimmering metal. For the Q3A Shader manual, click here.

Not only can you skin for Q3A, but also for Half-Life, and the upcoming Tribes 2. If a mod team is looking for a skinner, Email them and join up, it will only do you good.

In short, I really believe is self confidence. If you want to do something, do it damnit. That pretty much sums up that thought :p

Again, I hope you enjoyed and got a lot of info from this handbook thingy, and I look forward to seeing tons of new skins!

Check yall later,

Maury "Moose" Mountain III
 
Status
Not open for further replies.