
Specular Skin Shader
Created by: ChiQ
Tutorial copied with the friendly permission from Identity Crisis .
To create a shader or an environmental map for UT2003 you will need UnrealEd, which comes with the game, as well as a program that can export to DDS (Direct Draw Surface) or 32 Bit TGA. I used Photoshop 5. You may also find that the nVidia DXT plugin may come in handy.
To start, you should have your skin bitmap completed or at least a place-holder bitmap with an alpha channel in place. The alpha channel will map where on the bitmap the specular map will be applied, and the opacity at which it will be applied. The lighter the shade on the alpha channel the more opaque the shader will be, with white mapping 100% opacity. Black areas will have no shiny effect applied at all. I'm adding a section below onimplementing your skin manually, without reference to the export tool in UPaint, as this is how I had to do it.If you plan on using an EnvMap, you need an image that will be environmental-mapped on the mesh surface. This needs to be divisable by 2 as usual, i.e. 128x256, 64x64, etc. Here is the one I used for Kanika II:
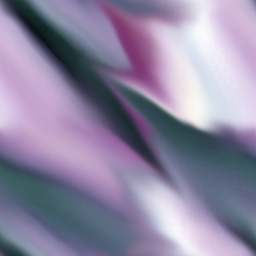
Note that it tiles. This isn't necessary, but I wanted to ensure that no seams would be visible, no matter how high the opacity of the shader.
Also note that you don't need an explicit shader for transparency. All you need is an alpha on the image, where white is your opaque area, and black is your transparent area.
Skin Implementation
Your skin will need to have a *.upl file. This file is a renamed text file. The contents will look like this - file, shader and package names (signified by blue, red, and
grey text, respectively) are up to you, but for the purposes of this tutorial I am using those of my first UT2003 skin,Kanika II in the file called 'kanikaiiskins.upl':
[Public]
Player=(DefaultName="Kanika II", Mesh=HumanFemaleA.MercFemaleA, species=xGame.SPECIES_Merc, Sex=Female, BodySkin=kanikaii.kanikametal, FaceSkin=kanikaii.kanikahead, Portrait=kanikaii.kanikaportrait, Text=XPlayers.kanikaii,Sex=Female,Menu="SP",FavoriteWeapon=xWeapons.LinkGun, Accuracy=-0.1, Tactics=+0.5)
Please note that everything below "[Public]" goes in just one line.
You will maybe notice that the file names have no suffix - this is because they are referenced fully in the package (grey). The content indicated by grey is something that doesn't
exist yet, nor does that in red. This tutorial is going to teach you how to create those files. The character portrait needs to be 256x512, alphaed. I used 32bit targas for all the image files listed above.
The information above assigns the model associated with the skin, the bot traits, and character species and name. The green text is the name assigned to your skin in the 'XPlayers.int' file. In that file you will need to add the information for your skin below:
kanikaii="Name: Kanika II|Age: 30|Race: Human||Data:|bio information here||"
This information should be ideally added in the text block assigned to the character class and sex, for the sake of tidiness. The OOTB 'XPlayers.int' has the female mercenary class skins together for example, so kanikaii was put in with MercFemaleAA and her colleagues.FYI: The "|" signs represent a line break each.
Once you have these parameters set in your new *.upl file and in the 'XPlayers.int' file (both live in your UT2003 system directory) you are ready to load up UnrealEd.
Creating a Package
Open UnrealEd. If your texture browser doesn't open automatically when you do so, go to the view menu and click on show texture browser. Once that is up, click the file menu, and select import.
Navigate to the directory containing your bitmaps, and select the one for the model's body. You will then see a dialogue with package and name fields (the only ones we will use here - group is for if you wish to create subsets within your package and would come between the grey and the blue, broken up by fullstops/periods in the *.upl file). Choose a name your package (i.e. kanikaIIskins) and enter the name you want assigned to the file, if you don't want the name the original bitmap has on your HDD. UnrealEd will then create a new package named kanikaiiskins and import your bitmap into it.
Once the texture is imported, right click on it. You will see a number of options. The first one you go to is properties. Under texture is an option, which is by default set to LODSET_world. You need
to set that to LODSET_PlayerSkin. Next you need to compress the file. For bitmaps with alphas you will
want to compress them to DXT5, by right-clicking and selecting Compress->DXT5. For bitmaps with 1 bit alpha channels you should use DXT3 instead, and for textures without alpha channel, use DXT1, which offers the highest compression. Import the head skin and portrait bitmaps the same way, but instead of setting the portait to LODSET_PlayerSkin, set it to LODSET_Interface.
Save your package.
Creating an Environmental Map
Now that all your bitmaps are imported and compressed, the fun starts. Click the file menu, and select new. You will then see a dialogue, presenting you with timilar fields to those in the import dialogue.
The package name should be in there already, but if it isn't it should match your grey name. Enter the name you wish to assign to your environmental map. I used "environment". It's ok to use such obvious
and unoriginal names, as the game sources these things by package, and this will be the only environmental map (envmap) in this package. Leave the Class as Raw Material. The only other thing you need to do is
change the pulldown menu below these fields (MaterialClass) to TexEnvMap, and then you can click through to add it.
Now you get a whole new dialogue. You will be presented with the material tree (top, right), and preview screen (top, left), and the properties fields (bottom). In the properties area is a field called Material, with none to the right of it. Click on none, and put in Texture'xxxxx.yyyyy', where xxxxx is the package name, and yyyyy is the name of the
environment image as you imported it - you know, the one that I showed at the top of this page")
If you click the cube button (second from the right, with the box icon on it) below the preview screen now you will be able to use your mouse to rotate the cube with your envmap on it - OOOH SHINY! You have just created an
environmental map.
Save your package.
Creating a Shader With Specularity
You are about to create the shader itself, but before you do scroll back up to the *.upl file sample I posted and look at the red bit. Whatever you assign as a name needs to be in the *.upl file where the red bit is. This shader is for the body skin.
Create a new material, as you did with the env.map, but instead of selecting TexEnvMap, you need to select Shader. The properties dialogue that pops up now is similar to those for the bitmaps and the envmap, but is a lot more complex. You need to assign materials now.
To the right of diffuse in the properties at the bottom, add Texture'xxxxx.zzzzz', where xxxxx is the package name, and zzzzz is the name of your texture bitmap for the body skin, as set when you imported it. That bitmap should have an alpha map, so you can now copy Texture´xxxxx.zzzzz' to the specularity mask material slot too.
To the right of specular put TexEnvMap'xxxxx.wwwww', where wwwww is the name of your env.map.
Now set PerformLightingOnSpecularPass to true. Once you've done that you can now click that cube button below the preview screen and check out your shader in action!
Save your package.
ENJOY!
You have just seen how I created the specular shader for Kanika II. If you gained something worth having from this tutorial write to me, and I'll write turorials for other kinds of shaders.
Trouble?
If you followed the steps above exactly, and your shader won't show up correctly ingame, make sure that your .upl file is correct: BodySkin has to point to your Shader, not your bitmap. Also make sure you don't use the same name for the shader and the body bitmap, and generally avoid being silly
What goes beyond this tutorial:
- Use an envmap on your face skin too. If you run into trouble needing more than one alpha channel on that bitmap, take a look at the opacity entry in your shader properties
- Try exploring shader effects some more. There are some neat things you can do with TexPanners, TexOscillators, Combiners and the like too.
- Use a CubeMap as environmental map. This creates more realistic reflections, but also increases your filesize, unless you use the same bitmap for all six sides of your cubemap. Using a cubemap as TexEnvMap works basically as described above, but instead of setting your bitmap as the TexEnvMap's material, you create a CubeMap first (via File->New in the Texture Browser) and assign your bitmaps to that cubemap, and then assign that CubeMap as the TexEnvMap's material.
Copyright (c) 2002 chiQ
Created by: ChiQ
Tutorial copied with the friendly permission from Identity Crisis .
To create a shader or an environmental map for UT2003 you will need UnrealEd, which comes with the game, as well as a program that can export to DDS (Direct Draw Surface) or 32 Bit TGA. I used Photoshop 5. You may also find that the nVidia DXT plugin may come in handy.
To start, you should have your skin bitmap completed or at least a place-holder bitmap with an alpha channel in place. The alpha channel will map where on the bitmap the specular map will be applied, and the opacity at which it will be applied. The lighter the shade on the alpha channel the more opaque the shader will be, with white mapping 100% opacity. Black areas will have no shiny effect applied at all. I'm adding a section below onimplementing your skin manually, without reference to the export tool in UPaint, as this is how I had to do it.If you plan on using an EnvMap, you need an image that will be environmental-mapped on the mesh surface. This needs to be divisable by 2 as usual, i.e. 128x256, 64x64, etc. Here is the one I used for Kanika II:
Note that it tiles. This isn't necessary, but I wanted to ensure that no seams would be visible, no matter how high the opacity of the shader.
Also note that you don't need an explicit shader for transparency. All you need is an alpha on the image, where white is your opaque area, and black is your transparent area.
Skin Implementation
Your skin will need to have a *.upl file. This file is a renamed text file. The contents will look like this - file, shader and package names (signified by blue, red, and
grey text, respectively) are up to you, but for the purposes of this tutorial I am using those of my first UT2003 skin,Kanika II in the file called 'kanikaiiskins.upl':
[Public]
Player=(DefaultName="Kanika II", Mesh=HumanFemaleA.MercFemaleA, species=xGame.SPECIES_Merc, Sex=Female, BodySkin=kanikaii.kanikametal, FaceSkin=kanikaii.kanikahead, Portrait=kanikaii.kanikaportrait, Text=XPlayers.kanikaii,Sex=Female,Menu="SP",FavoriteWeapon=xWeapons.LinkGun, Accuracy=-0.1, Tactics=+0.5)
Please note that everything below "[Public]" goes in just one line.
You will maybe notice that the file names have no suffix - this is because they are referenced fully in the package (grey). The content indicated by grey is something that doesn't
exist yet, nor does that in red. This tutorial is going to teach you how to create those files. The character portrait needs to be 256x512, alphaed. I used 32bit targas for all the image files listed above.
The information above assigns the model associated with the skin, the bot traits, and character species and name. The green text is the name assigned to your skin in the 'XPlayers.int' file. In that file you will need to add the information for your skin below:
kanikaii="Name: Kanika II|Age: 30|Race: Human||Data:|bio information here||"
This information should be ideally added in the text block assigned to the character class and sex, for the sake of tidiness. The OOTB 'XPlayers.int' has the female mercenary class skins together for example, so kanikaii was put in with MercFemaleAA and her colleagues.FYI: The "|" signs represent a line break each.
Once you have these parameters set in your new *.upl file and in the 'XPlayers.int' file (both live in your UT2003 system directory) you are ready to load up UnrealEd.
Creating a Package
Open UnrealEd. If your texture browser doesn't open automatically when you do so, go to the view menu and click on show texture browser. Once that is up, click the file menu, and select import.
Navigate to the directory containing your bitmaps, and select the one for the model's body. You will then see a dialogue with package and name fields (the only ones we will use here - group is for if you wish to create subsets within your package and would come between the grey and the blue, broken up by fullstops/periods in the *.upl file). Choose a name your package (i.e. kanikaIIskins) and enter the name you want assigned to the file, if you don't want the name the original bitmap has on your HDD. UnrealEd will then create a new package named kanikaiiskins and import your bitmap into it.
Once the texture is imported, right click on it. You will see a number of options. The first one you go to is properties. Under texture is an option, which is by default set to LODSET_world. You need
to set that to LODSET_PlayerSkin. Next you need to compress the file. For bitmaps with alphas you will
want to compress them to DXT5, by right-clicking and selecting Compress->DXT5. For bitmaps with 1 bit alpha channels you should use DXT3 instead, and for textures without alpha channel, use DXT1, which offers the highest compression. Import the head skin and portrait bitmaps the same way, but instead of setting the portait to LODSET_PlayerSkin, set it to LODSET_Interface.
Save your package.
Creating an Environmental Map
Now that all your bitmaps are imported and compressed, the fun starts. Click the file menu, and select new. You will then see a dialogue, presenting you with timilar fields to those in the import dialogue.
The package name should be in there already, but if it isn't it should match your grey name. Enter the name you wish to assign to your environmental map. I used "environment". It's ok to use such obvious
and unoriginal names, as the game sources these things by package, and this will be the only environmental map (envmap) in this package. Leave the Class as Raw Material. The only other thing you need to do is
change the pulldown menu below these fields (MaterialClass) to TexEnvMap, and then you can click through to add it.
Now you get a whole new dialogue. You will be presented with the material tree (top, right), and preview screen (top, left), and the properties fields (bottom). In the properties area is a field called Material, with none to the right of it. Click on none, and put in Texture'xxxxx.yyyyy', where xxxxx is the package name, and yyyyy is the name of the
environment image as you imported it - you know, the one that I showed at the top of this page
If you click the cube button (second from the right, with the box icon on it) below the preview screen now you will be able to use your mouse to rotate the cube with your envmap on it - OOOH SHINY! You have just created an
environmental map.
Save your package.
Creating a Shader With Specularity
You are about to create the shader itself, but before you do scroll back up to the *.upl file sample I posted and look at the red bit. Whatever you assign as a name needs to be in the *.upl file where the red bit is. This shader is for the body skin.
Create a new material, as you did with the env.map, but instead of selecting TexEnvMap, you need to select Shader. The properties dialogue that pops up now is similar to those for the bitmaps and the envmap, but is a lot more complex. You need to assign materials now.
To the right of diffuse in the properties at the bottom, add Texture'xxxxx.zzzzz', where xxxxx is the package name, and zzzzz is the name of your texture bitmap for the body skin, as set when you imported it. That bitmap should have an alpha map, so you can now copy Texture´xxxxx.zzzzz' to the specularity mask material slot too.
To the right of specular put TexEnvMap'xxxxx.wwwww', where wwwww is the name of your env.map.
Now set PerformLightingOnSpecularPass to true. Once you've done that you can now click that cube button below the preview screen and check out your shader in action!
Save your package.
ENJOY!
You have just seen how I created the specular shader for Kanika II. If you gained something worth having from this tutorial write to me, and I'll write turorials for other kinds of shaders.
Trouble?
If you followed the steps above exactly, and your shader won't show up correctly ingame, make sure that your .upl file is correct: BodySkin has to point to your Shader, not your bitmap. Also make sure you don't use the same name for the shader and the body bitmap, and generally avoid being silly
What goes beyond this tutorial:
- Use an envmap on your face skin too. If you run into trouble needing more than one alpha channel on that bitmap, take a look at the opacity entry in your shader properties
- Try exploring shader effects some more. There are some neat things you can do with TexPanners, TexOscillators, Combiners and the like too.
- Use a CubeMap as environmental map. This creates more realistic reflections, but also increases your filesize, unless you use the same bitmap for all six sides of your cubemap. Using a cubemap as TexEnvMap works basically as described above, but instead of setting your bitmap as the TexEnvMap's material, you create a CubeMap first (via File->New in the Texture Browser) and assign your bitmaps to that cubemap, and then assign that CubeMap as the TexEnvMap's material.
Copyright (c) 2002 chiQ