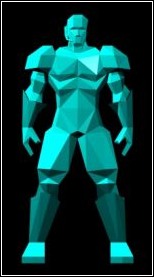
[Modelling] : Making the UT guy

  • Two Factor Authentication is now available on BeyondUnreal Forums. To configure it, visit your Profile and look for the "Two Step Verification" option on the left side. We can send codes via email (may be slower) or you can set up any TOTP Authenticator app on your phone (Authy, Google Authenticator, etc) to deliver codes. It is highly recommended that you configure this to keep your account safe.
Status
Not open for further replies.

SaD

Skincollecting Fanatic
Sep 6, 2003
3,088
2
38
54
Germany
skincity.beyondunreal.com
Making the UT guy:

Created by Rog 3D

Tutorial copied with the friendly permission from Identity Crisis .

What you will need:
1) This Tutorial.

2) 3DSMAX

3) UTGuy Reference Image

1) Ok First thing is to set up the Reference Image into the "Front" Viewport in Max. To do this go to the Views Menu & Backround Image
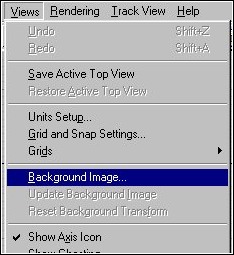
Image2.jpg


Then Click on Files ...

Image3.jpg


... and point it to where you have the Reference Image stored.
Once its loaded check the "Match Bitmap" and "Lock Zoom Pan" box.
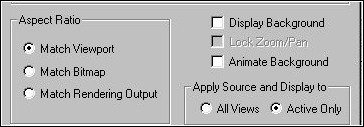
Image4.jpg


Once youve done that save the scene.

2) Now ... Lets see what we have.

(Note. This will be slightly different to modelling from a Concept sketch as how we are to make the mesh is already laid down for us ie. we are modeing a model. :))

Ok Lets start with the shoulders.

Go to the Create panel

Image5.jpg


and select "Sphere"

Image6.jpg


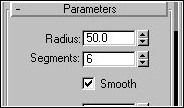
and enter the Following Values

Image7.jpg


You can also untick the "Smooth" Box in there too.As we are modeling in Facets mode.

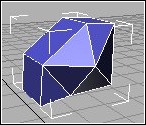
The Radius value should be about right for you but basically what you want to do is draw the sphere in the position of the charachters Shoulder pad. Like so:
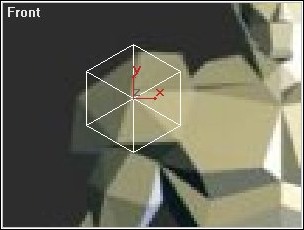
Image8.jpg


Also now would be a good time to select "Edged Faces" in the Perspective View.
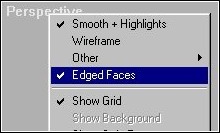
Image9.jpg


This is so we can see the edges clearly in the viewport.

Now, with the sphere selected ... right Click on the "Modifier Panel"

Image10.jpg


and right click on the "Edit Stack" button

Image11.jpg


and select: Collapse to "Editable mesh"
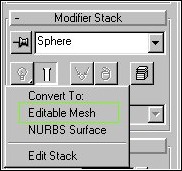
Image12.jpg


Ok what you want to do now is go to "Subobject" mode
and Vertex Level, (There is also Face and Edge levels but we will see them later on.)

Image13.jpg


Now what you have to do is select the Verts on the Front View and drag them into the shape of the shoulder pad. When you select the vert you wnat to move for this we want to move the back verts at the same time as the Front ones so drag the mouse over the area of the vert so that you select both the front and the back. Like this:

Image14.jpg


Once the front and back verts are selected drag them into position to the nearest corner on the image so you end up with something like this:
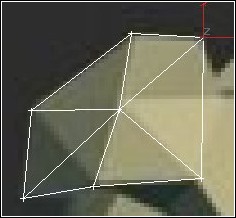
Image15.jpg


3) To do this select

Image16.jpg


again and this time click on the field that says "vertex" and select "Edge" from the pull down menu:

Image17.jpg


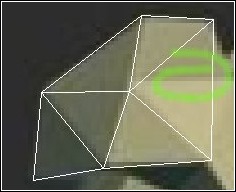
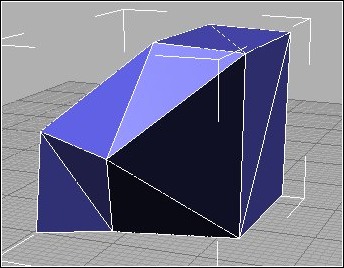
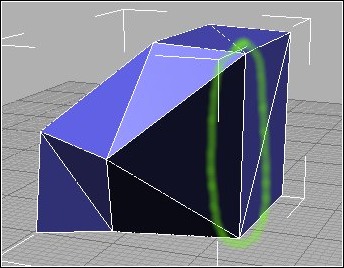
Ok, First we will turn an edge that we can see is going in the wrong Direction. This one:
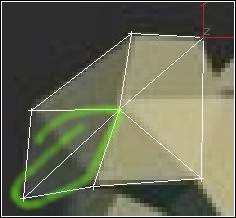
Image18.jpg


Ok, in Subobject - Edge Level scroll down untill you see this section.
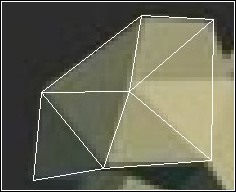
Image19.jpg
Image20.jpg


Note: Now that we know how to turn edges i wont go through it everytime i mention turning an edge. :) Simply refer to this section above.
 

SaD

Skincollecting Fanatic
Sep 6, 2003
3,088
2
38
54
Germany
skincity.beyondunreal.com
If we look at the image we can see that we are missing a section here:

Image21.jpg


This time you want to Select "Divide" What you can also do to help things is scroll down till you see this panel:

Image22.jpg


Drag and select all the faces of the mesh making sure the "Ignore Back Faces" box is unticked.

Image23.jpg


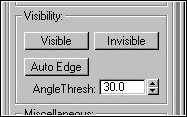
and hit the "Visible button", this will make Turning and Divinding of edges etc easier.


Ok get the mesh in the perspective view like so:

Image24.jpg


So what we have to to is split this edge. Again go to:
Image25.jpg


Level and the Scroll down till you see this panel:

Image26.jpg


Select
Image27.jpg
from it ...

Then click on this edge:

Image28.jpg


and this should happen:

Image29.jpg


Do the same to the edge behind it so it looks like this:

Image30.jpg


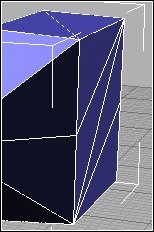
Then turn that edge inbetween so it looks like this:

Image31.jpg


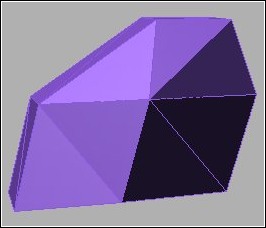
Good. Now the shoulder is nearly done all we need to do is drag a few verts here and there untill you are happy that it is as close as you can get to the image. So you have it looking like so:

Image32.jpg


Ok Good now we can start on the chest plating/Shoulders. I used a cylinder to start off with. Go to the Create Panel
Image33.jpg
and select
Image34.jpg
the Panel. Give it "6 Sides and 2 Height Segments like so

Image35.jpg


You can also untick the Smooth box if you like) Draw the Cylinder like So:

Image36.jpg
 

SaD

Skincollecting Fanatic
Sep 6, 2003
3,088
2
38
54
Germany
skincity.beyondunreal.com
Remember to Convert to editable mesh and make all the edges visible(In edge mode) like i explained earlier. (You can just add an edit mesh if you like)

Right, now you do as you did with the Shoulder and drag so the line up with the image like so:

Image37.jpg


Now if we look closely we can see that chest has one to many Verts, so what we need to is to get rid of it by welding it to another...

Go to the
Image38.jpg
mode of the Cylinder and then move the vert that we want rid of ontop of another vert like so

Image39.jpg


Now we need to go to the Weld panel and set the threshhold to 2 (Roughly, the higher the value the biger radius it will weld verts within)

Image40.jpg


So select the two verts you want to fuse together and then hit "Selected". If you get no message you know it has worked, if you get a message like this:

Image41.jpg


Chances are the verts are too far apart from each other. Either move them closer or increase the "Weld Thresh value"

Now you know how to weld verts. :) You should now have something like this:

Image42.jpg


These Verts could also do to be welded ... rinse repeat .. etc. :)
Image54.jpg

The next step is to Join these 2 objects together so we have a shoulder complete. I wont go too deeply into this as all you are looking to do is attach the 2 objects together.

Do this in the
Image43.jpg
panel of one of the objects and with the Sub-object mode turned off Select "Attach"

Image44.jpg


and then click the object you want to attach to.

So now you have one object. Now what you want to do is look at where the points are and think to yourself ... "right that Vert is next to that vert so i can weld that. You can see in the image above a prime example of this where 2 verts on the front of the Chestplate are right next to 2 verts on the Shoulder pad. They need to be welded. This is where the practice comes in. If you have a vert too many or too less the you will need to create another on for it to weld to. A good example is if you are attaching a hand to an arm and the wrist of the ark is 5 segments and the hand is 4 the you will have one vert left over. So either you need to wel that toanother vert so you dispose of a face. leaving 4 segments on the wrist and 4 on the hand or you "Split and edge" on the 4 segment object to give it 5 Segments. Make sense? :)

Go around the object welding Verts and Spliting Edges keeping a close eye on the refrence image. Untill you have something like this:

Image45.jpg


Note: The closer you position and plan how the object will attach then the quicker and easier the process will be.

OK cool, thats looking ok now. :)
 

SaD

Skincollecting Fanatic
Sep 6, 2003
3,088
2
38
54
Germany
skincity.beyondunreal.com
Ok looking at the Mesh i can see a simple extrude to do:

Image46.jpg


These 2 Faces can be extruded nicely to give the top of the Shoulder. Got to

Image47.jpg


mode of the object and select the 2 faces:

Image48.jpg


then Goto the "Extrude" menu contained within the Face panel:

Image49.jpg


Click on the arrows next to the amount window and push up. The faces will rise out of the object like so(You can also just add a value into the box):

Image50.jpg


Now you want to got to Vertex level and move the verts around to match the Reference Image like so:

Image51.jpg


Ok thats Half a Chest and a Shoulder. Now, thats should give you a good idea of how the model was done. So rather expain every aspect of the Model and repeat every step, covering ground that you have already done ill wrap up with a few hand tips to keep in mind ...

Righty. Some points to take into account:

Only model half, you can the copy and mirror the part and the weld the 2 sides together. Unless of course you are modeling some Mutant type monster. :)

The way i approach a model like this is to isolate a part of the model to work on, ie the Leg. and get that so it looks good then start on the Foot. Then join the 2 together.

when creating parts of a model say for example an arm, try and keep the amount of segments that the part is made of as low as you can, i personaly find it easier to add more detail than to have to get rid od segements. That way also seems to keep the model looking neater.

The more angles of a model you have drawn to work with the better. Usually the best is a Front and side Elevation, this should make the model tie up nicely.

Now, once the model looks complete, as we were working with a front elevation only we will have some work to do with the rest of the model, a lot of thiswork will be done by just looking at things and moving. Use other sources to make sure your model looks good all-round. Unreal Tournament is out now so you can use the images/ingame stuff to check the model.

Image52.jpg


Ok, heres the side elevation, as you can see it needs some work, mainly in the Leg area. It also looks to Vertically "Rigid" looking. You may need to add polys here and there to give the right effect. But have a look at other models and see how the look from the side. The Charachter is Human so if it looks Human from the side you know you are on the right track.

Image53.jpg


If you have any questions on the Tutorial, or you have any suggestions as how to make my modeling easier. Let me know! ... email me here ...

rog3d@rog3d.screaming.net

I hope this was somehow usefull. Thanx. -Rog3D
 
Status
Not open for further replies.