[General]-Skinning : Moose's Tips: Cloth
Tutorial copied with the friendly permission from Identity Crisis .
If I were to offer some inspirational speech for doing fabric, the best thing I can say is, this - OBSERVE, OBSERVE, OBSERVE.
You wear clothes every day (assuming that you are human) so look at the stuff you wear! look at other people! look at your self in a mirror. Study the way fabric moves over the shoulders, and stomach area. I could go through every place I can think of, but you know what you need to work on, so just study real life stuff, then take what you learn to skinning.
Step 1
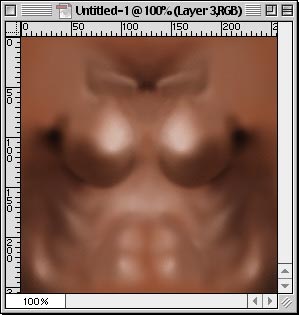
When doing cloth, such as a shirt or something, and I want flesh to show through I will do the flesh first. That is what these first 2 steps are, getting the stuff that is underneath the clothing right first, then tackling the clothing.
For this model I will be using the Female Soldier model.
Step 2
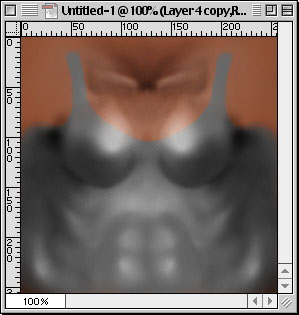
After the flesh is done, I rough out where I want the shirt to be. I was going for a tank top type thing here, so that's the reason for that shape.
Now, how I did this, I just made a new layer, of a solid gray colour, and changed the layer mode to saturation. If this isn't the look you are going for, then try another mode. This also is just the under layer of the clothes, the next step goes into the actual fabric.
Step 3
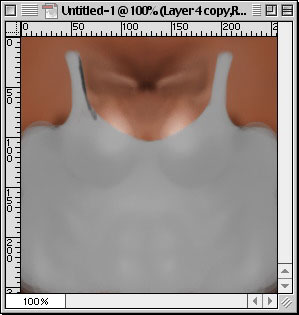
I duplicated the last layer, and set it to screen (I think) then tweaked the opacity to about 75 or 80 %.
Not much to this step, just getting the look right
Step 4
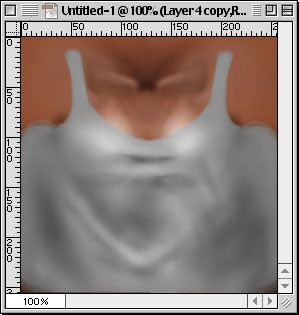
Now, I start painting on the layer that has the 80% opacity in areas where there should be shadows. I gather this info from the stuff I have learned about clothing by looking at it.
I occasionally will use a photo for reference.
Step 5
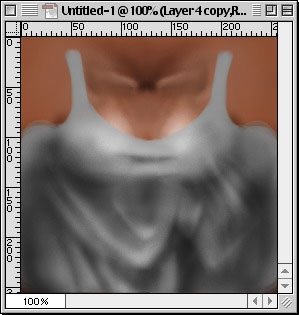
Refining further with shadows and highlights.
Notice that you cant really see the transparency on this layer anymore, but it is still there as a feel rather than being the most important thing.
I also start noticing areas that just want to be pulled out... so I do it.
Step 6
Refining yet more. I think this looks cool now, so lets move on to more nitty time-consuming stuff

Step 7
I want to put a slight line in at the top of the shirt thing, and I wasn't trusting my hand at the time, so I thought I would use a path to do it
If you have never used paths before, it is a great tool to use to make curvy lines without having to move your hand too much. To get to the pen tool, simply press P (in Photoshop). when you click once, you will see a box, then click in the next area you want to put a point. Click and hold there, and drag the handles to curve the line to match what you have.
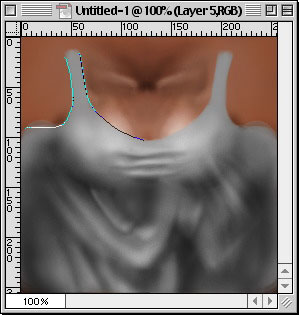
After getting all the lines in that you want, go to the paths pallette and click on the arrow in the upper right corner to bring up the path stuff and choose "Stroke selection." You can choose any tool, but I like to stick with the airbrush. One thing to remember, if you have a HUGE brush on the airbrush, the line will be stroked HUGE. So make sure to make the brush size be small!!! And make a new layer for the stroke!!!
Step 8
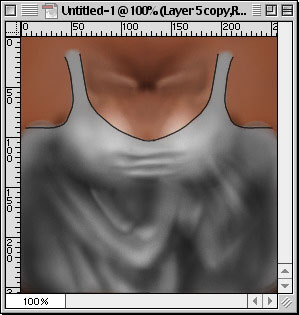
The stroke now is waaaay to visible. Time to tone it down a bit.
>> Next step.
Step 9
I set the black stroke to overlay, and it isn't as light as I would want it to be, but you can be the judge of that.
If you want to see what my layers look like up till this point...
Check it out
Step 10
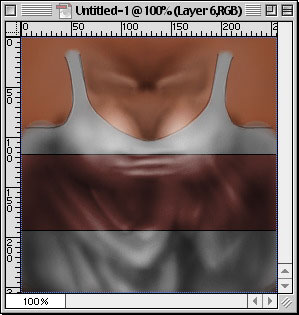
For added pizzazz, I thought I would add a stripe across the chest... to make her a runner of some sort.
This was done with just a layer of colour set to Overlay.
Done
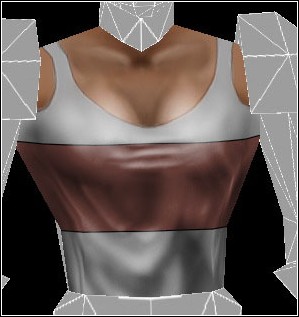
And this is what The texture looks like on the model.
Its not too fitting of this specific model... but ah who cares
Tutorial copied with the friendly permission from Identity Crisis .
If I were to offer some inspirational speech for doing fabric, the best thing I can say is, this - OBSERVE, OBSERVE, OBSERVE.
You wear clothes every day (assuming that you are human) so look at the stuff you wear! look at other people! look at your self in a mirror. Study the way fabric moves over the shoulders, and stomach area. I could go through every place I can think of, but you know what you need to work on, so just study real life stuff, then take what you learn to skinning.
Step 1
When doing cloth, such as a shirt or something, and I want flesh to show through I will do the flesh first. That is what these first 2 steps are, getting the stuff that is underneath the clothing right first, then tackling the clothing.
For this model I will be using the Female Soldier model.

Step 2
After the flesh is done, I rough out where I want the shirt to be. I was going for a tank top type thing here, so that's the reason for that shape.
Now, how I did this, I just made a new layer, of a solid gray colour, and changed the layer mode to saturation. If this isn't the look you are going for, then try another mode. This also is just the under layer of the clothes, the next step goes into the actual fabric.

Step 3
I duplicated the last layer, and set it to screen (I think) then tweaked the opacity to about 75 or 80 %.
Not much to this step, just getting the look right

Step 4
Now, I start painting on the layer that has the 80% opacity in areas where there should be shadows. I gather this info from the stuff I have learned about clothing by looking at it.
I occasionally will use a photo for reference.

Step 5
Refining further with shadows and highlights.
Notice that you cant really see the transparency on this layer anymore, but it is still there as a feel rather than being the most important thing.
I also start noticing areas that just want to be pulled out... so I do it.

Step 6
Refining yet more. I think this looks cool now, so lets move on to more nitty time-consuming stuff

Step 7
I want to put a slight line in at the top of the shirt thing, and I wasn't trusting my hand at the time, so I thought I would use a path to do it
If you have never used paths before, it is a great tool to use to make curvy lines without having to move your hand too much. To get to the pen tool, simply press P (in Photoshop). when you click once, you will see a box, then click in the next area you want to put a point. Click and hold there, and drag the handles to curve the line to match what you have.

After getting all the lines in that you want, go to the paths pallette and click on the arrow in the upper right corner to bring up the path stuff and choose "Stroke selection." You can choose any tool, but I like to stick with the airbrush. One thing to remember, if you have a HUGE brush on the airbrush, the line will be stroked HUGE. So make sure to make the brush size be small!!! And make a new layer for the stroke!!!
Step 8
The stroke now is waaaay to visible. Time to tone it down a bit.
>> Next step.

Step 9
I set the black stroke to overlay, and it isn't as light as I would want it to be, but you can be the judge of that.
If you want to see what my layers look like up till this point...
Check it out
Step 10
For added pizzazz, I thought I would add a stripe across the chest... to make her a runner of some sort.
This was done with just a layer of colour set to Overlay.

Done
And this is what The texture looks like on the model.
Its not too fitting of this specific model... but ah who cares

Last edited:

