This tutorial explain on how to make simple cool stuff in your sigs or other stuff using IR (image ready)
If you have photoshop 7 and over , you have Image ready , it commes with it.
Image ready is a powerfull software that photoshop can link with. It can optimize your work and make animations.
All animations are .GIF files , JPEG are good for stand still pictures.
To link photoshop with Image Ready
click on this box at the bottom
of your tool box:

=====================================
Index
Chapiter 1 : Getting started
Chapiter 2 : Starting to animate
Chapiter 3 : Fading layers in animations
Chapiter 4 : More advanced stuff
Chapiter 5 : AVI->GIF
Chapiter 6 : File Size warning
=====================================
Chapiter 1 : Getting started
First of all , Photoshop is a ram lover . If you think you pc can handle it then don't worry with it.
When you start a blank work , you might have a block sometimes. It's normal
Maybe you never worked with little details , it can be alot easier than you might think , you will enjoy making them after reading all this Guide . I have learned all these by myself. I searched for somme tutorials to get somme tips and hits with Image Ready , and now i provide you my knowledge.
Start SIMPLE details , like a cubes and Rectangles . If you are Very new with photoshop , and you have the hang of MSpaint , you can do simple black detail , copy them and paste them in photoshop then. All good photoshop users have alot of layers for a single project . Layers are simple to use and ther purpose is to make your life easier
There is a powerfull 'tool' that you can find in the layer box :

All these are here for mixing the parent layer with the children one. I love them , and personally , it's my favorite 'tool' . It's called : Layer blending.
You could be confused with ''Blending option'' and ''Layer Blending''.
They are both very different. There you got a good sample of Layer blending's capacity:
ORIGINALS :


I have used the first original as the parent. and set it to 'Linear Light' , look what i got now:
MIXED :

You can also do a border like on most sigs by :
New layer
Select all
Edit->Stroke = 1px White/black From inside
Deselect
Magic wand tool , then , click in the middle
Select -> contract = 1px
Edit->Stroke = 1px White/black From inside
This is a good purpose to get started with a sig
=====================================
Chapiter 2 : Starting to animate
This chapiter is about the very basic in animating , how it work.
Once you got a background (preferably) and you are ready , let's do it!
Switch to ImageReady with the ''Jump to ImageReady'' button

Animating is all about layers. They play everything in animating - No layers , no animation.
You can use text , and 'Rasterize' them to make an animation letter-for-letter.
Ok here i start , i have a simple white cube in my sig :

What i want to do here , is to make that cube (layer2) move on the right a little for 1 frame 0.1 sec.
(Note that you can hide the layer by pressing the little eye near the layer)
I created a new frame by clicking on the sheet thing ''new frame'' , and after this frame is created , i moved 'layer2' a little on the right

To get this when i clicked on 'play'

...................................................

''yea right, bring on the reall stuff already.....''
As you can see , if i click back on the previous frame , the layer will move.
So it mean you can have the layer anywhere for each single frame(s)
But you can't rotate the layer or do other things with it .
You can only move it and fade it. (and other advanced tricks like layer mask hueing)
=====================================
Chapiter 3 : Fading layers in animations
This chapiter might be your favorite.
Here i explain on how to make fading text and other stuff , you can do alot of things with it.
We want a serious thing , no bull****!
I have worked on a new animation this morning :

It contain 70 frames , more than you have expected so far....
It need ALOT of patience. you need to take it relax and think about the possible. you will make it easily.
But we will start with something a little more simple first.
Fading text
Nice and easy to make , fading text are good for your sigs.
Start by making a text
(look at www.dafont.com for lots of fonts , i use 'BIRDMAN')
Once your text is done , Rasterize it.
(right click on the layer and click Rasterize)
Duplicate the text layer for each words
Example :

Here , i got a layer for each word. If i make them animated i have this :

WARNING : when you do something and you have the parent frame selected ,
becarefull of what you do.Because if you change something ,
all the previous frames will do the same action.
It is usefull when you want it to do so tough.
Now we want it to fade a bit , letters-for-letters.
You need to change the opacity of the layer for each new frames you do.
like this:

You can use multiple layer at the same time that are fading. It is just a personal info for each frame of the layer itself.
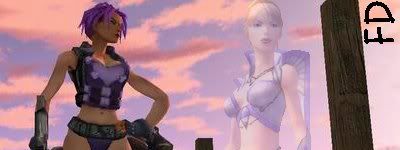
An animated sig is always better when the animation is clean , and well distanced. Like this one :

But here you got it , you might now have alot of idea in mind.
=====================================
Chapiter 4 : More advanced stuff
Ever wanted to know how to make a single part in your sig that is animated with fading borders like this? :

Or a grain Screen looking like that? :

This chapiter will explain it
Let's start with the easiest of them.
Open a small image you like (not bigger than 200 px , if so , scale it down preferably)
Something like this :
http://img173.exs.cx/img173/4145/1023jh.jpg
Then create a new document with the EXACT height ,
and make the width 150 px bigger and a white background
Filter->Texture->Texturizer
Set it to this :
http://img173.exs.cx/img173/3547/1035uu.jpg
Now it's certain you have this :
http://img173.exs.cx/img173/923/1011oq.jpg
Then put it with your picture and ''jump to ImageReady''
In ImageReady, View->Snap
Then put the grain texture at the very edge of the main pic.
(left or right dosen't mather)
Start by creating a new frame and with that frame selected, start to move the pic a little (3 to 10 px)
Do 3 frames minimum and 5 frames maximum (filesize)
And set the Master layer as 'Linear Burn'
It could be a better result if you have another pic than mine ,
it was the more apropriate for mine.
Now , you should have something like that :
http://img173.exs.cx/img173/8434/1040sl.gif
I used 3 frames for this one , and the file size is 60 KB.
Now , the other exercise is more advanced.
you will learn the best technique i have learned for IR's animation so far.
Open a sig of yours
Here's mine :

Then use the Brush tool with the following settings :
(and total black like color)
http://img173.exs.cx/img173/6903/1063da.jpg
Then drag the brush where you want to have animation
(keep in mind the filesize! Chapiter 6)
Sommething Like this :
http://img173.exs.cx/img173/8602/1074mk.jpg
Select the ''Magic wand tool'' and set the tolerance for 25 ,
and click inside the black holes.
Now you got your hole selected, create a new layer.
With this layer, Edit->Fill = White
You should have sommething like this :
http://img173.exs.cx/img173/7263/1080ab.jpg
With the 'brush tool' and all the same setting again.
Delete the borders or the layer (don't be afraid to pass over and over again.)
http://img173.exs.cx/img173/8927/1097ig.jpg
''Jump to ImageReady''
You can make alot of animation kind , i will show you a real basic one.
You can use this texture :
http://img173.exs.cx/img173/7707/lasertext6gp.jpg
Open the texture and put it inside the current progect
Now there's the trick , press CTRL+G to link the texture with the ''white holes''
http://img173.exs.cx/img173/75/1104rn.jpg
Cool heh?
Now you can make the animation.
You just need to make the animation untill you get back to the same point (the texture is perfecly aligned)
And Voila!

The file size is 132 KB
It could be lower on the file size though.
And this is what the last chapiter cover.
=====================================
Chapiter 5 : AVI->GIF
So many of them
alot of ppl love to use them to make funny post or other stuff
I use my own techinque that somme ppl would say i have time to waste on.
Again , think about the possible and don't mind the ''time wasting''
Once you got your video opened
Use print screen to take a shot of each frame you want
''
 are you crazy?''
WARNING : It is very important that you don't move the player while doing this , it will make it fail
After that you got all your frames (30 is way too much)
Select the ''crop tool'' and only cut the movie screen
You should have it now , you just need to be patient and animate them
Why complaining? you got all the frames!
This is my own technique , i have done alot of them with it.
I don't know any plugin for that or something else
=====================================
Chapiter 6 : File Size warning
File size , it is VERY important to don't have a single sig that take 600 kb ,
it make ppl crazy , think about the 65k'ers.
I have already done that kind of error , and now my sigs are almost never highter than 100 kb
GIF's are tricky with the file size
The smaller you keep the animation's room , the smaller your file size will be
Here i got a perfect example :

This sig have 70 frames and take less than 70 KB.
I am not a scientist or something but my find are that gif's keep a small allocation for animation.
So that's about it
The sig we have done in that process used a big portion in animation.
Somme sigs have too much frames that are completely taking the sig in animation , it make the file size Wayyy too big.
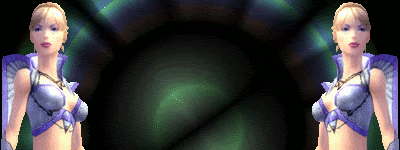
make some animation like them :

They are good in file size , and they are ok for my eyes.
=====================================
This conclude ''Animating Guide for IR's Basics''
If you have watched completely this tutorial while being unknow to animating , and it helped you , don't be afraid to post somme of your work here , i would apreciate to see them
Good luck with ImageReady and Photoshop and Happy Brushing
Last edited: