Moose's Tips: Faces!!!!
Tutorial copied with the friendly permission from Identity Crisis .
Please note, all images are thumbnails leading to larger images.
Making a human face for your character could be one of the most frightening things to do because that is one of the first things people will look at, and possibly judge your skin on that. In this tutorial, I will go through my step by step process in making a face. The example if from my Demoman skin for Weapons Factory UT.
Step 1
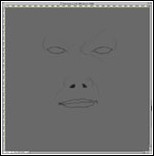
First off, before I start doing any colour stuff, I draw out roughly what I want the face to look like. This involves putting the eyes in the right spot, mouth nose, and any other goodies I want to add to it.
This part can be tricky, so make sure you check the UV mesh and make sure your parts are going in the right spot.
You have 2 options for drawing this... you can either a) draw it on the layer you plan on painting on, or b) make a new layer and draw on it so that the black lines don't appear in the final face (they shouldn't appear in the final face any way because you will paint over them).
Step 2
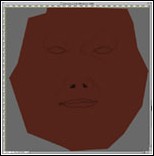
This part of the skin could be the most important part you do. Here I started with a darker colour, mainly because I wanted this dude to look African-American. Recently I have been starting with a colour that could give nice tone to the face. You could try starting with a blue, or green and then painting over it completely leaving and sample colours from around it to get new colours.
Notice that I do suggest working straight in colour over starting in grayscale then adding colour. I think you can get better colour variability this way.
Step 3
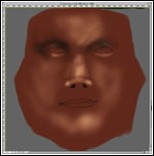
This is kinda step 3 and 4... I just took the screen shot too late.
What I do here is go in and add highlights on the face to show feature and to just roughly get myself acquainted with it.
This is all done VERY loosely, and no attention to detail, you are just laying down colours here. I do not use white to show highlights, I generally get the lightest colour I can without going all the way to white so that the face doesn't look reflective instead of skin-like.
Step 4
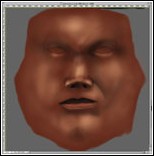
After I get the highlights, move into the shadows to compliment the highlights. I start putting shadows in the eye sockets to define the eyes more, and at the bottom of the nose to give it depth.
I will also do the lips here too... but mainly just values, no real lip colour yet. I'm just working with the shadows.
Step 5
When I feel the shadows have gotten to a point where I like them, I start pushing the shadows and lights around and start defining areas a bit.
If you look in the lower part of the example to the right, notice the crease coming from the nostril down the cheek. This is what I mean by defining slightly. Also by they eyes, I start putting in the definition of the eye lids.
Once the face kinda looks like a face without eyes, I put the eye colour in. I never use white, but I do use a light shade of gray. Then I add blue and red to it, with maybe a tinge of yellow.
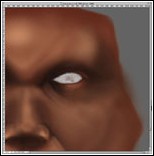
Step 6
Ah, the eye is almost complete. I defined the inside of the eye with the colour and made it look like and eye.
At this point I usually start tightening up a bit and moving in to smaller areas to get them looking better. When you start out loosely, it will give you a rough layout of what you are going to do, and it makes it easier once you want to start getting into details.
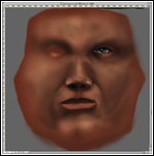
Step 7
I did the eye on the other side now, and the face is looking more human like now. The face may seem a bit flat however, so you may need to start refining the form.
I went in with this guy and put some purple shadows (not black) in areas that I thought needed it. Some areas that you may find need it will be the underside of the cheeks, above the eyes, the sides of the nose, sides of forehead, underneath the lower lip, etc.
this will look goofy when you do it, but relax, the purple will end up being just and effect after long.
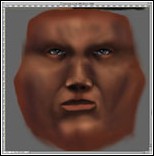
Step 8
See? what I did was to go in and sample a colour from around the purple and go over it at a very light opacity ( around 3 or 5). then after you do that, sample the colour (if you are using the airbrush, press alt/option and click) and start painting over it.
I repeat this multiple times in multiple areas of the shadow to blend the purple in.
Get this to a point where the skin is looking more lifelike and move on...
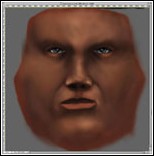
Step 9
Further work is then done with the shadows. I add some more purples and a little deep red to really push back the dark areas.
I now am starting to hone in on specific areas, like the space between the eyes and nose.
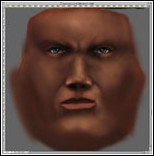
Step 10
eye brows! although eyebrows supposedly don't show beauty (as said by the masters of art - why Mona Lisa has very faint eyebrows) you gotta put them on there if you want your face to look masculine.
You can do SO much with eyebrows. If you angle them a certain way, the ENTIRE mood of the face will change drastically. Take your time and find the perfect eyebrow angle, it could make or break your face.
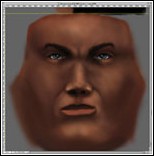
Step 11
More details, start refining the eyes, lips, and defining areas.
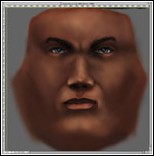
Step 12
even more detailing. By this time I have moved down from using a very large brush to almost using the smallest brush to refine areas that need it. I really start bringing out the upper lip and areas of the cheeks now. The forehead is also given some details by adding bumps and creases.
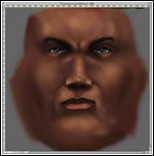
Step 13
Almost finished... just have to add the hair. I usually always add the hair after I have already done the top of the head. I find it is easier this way.
After I do the hair, I check and make sure there aren't any other areas I want to define further. If there are, I do it with tiny brushes and at low opacity.
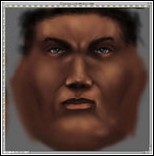
This here is the finished face on the model. It turned out quite nicely I think
One thing to remember is that males and females have MUCH different facial features. The structure is the same - eye sockets, noses, etc, but the quality of the skin is what differs.

If you have trouble doing male or female faces, look at some. Find some pictures online and study them. Use your friends- ask them to model for you. Use pictures, or hell you can even use a mirror.
If you really want to make convincing faces, study what you want to do first by looking at faces... then tackle the face.
Happy skinning,
Moose
Tutorial copied with the friendly permission from Identity Crisis .
Please note, all images are thumbnails leading to larger images.
Making a human face for your character could be one of the most frightening things to do because that is one of the first things people will look at, and possibly judge your skin on that. In this tutorial, I will go through my step by step process in making a face. The example if from my Demoman skin for Weapons Factory UT.
Step 1
First off, before I start doing any colour stuff, I draw out roughly what I want the face to look like. This involves putting the eyes in the right spot, mouth nose, and any other goodies I want to add to it.
This part can be tricky, so make sure you check the UV mesh and make sure your parts are going in the right spot.
You have 2 options for drawing this... you can either a) draw it on the layer you plan on painting on, or b) make a new layer and draw on it so that the black lines don't appear in the final face (they shouldn't appear in the final face any way because you will paint over them).

Step 2
This part of the skin could be the most important part you do. Here I started with a darker colour, mainly because I wanted this dude to look African-American. Recently I have been starting with a colour that could give nice tone to the face. You could try starting with a blue, or green and then painting over it completely leaving and sample colours from around it to get new colours.
Notice that I do suggest working straight in colour over starting in grayscale then adding colour. I think you can get better colour variability this way.

Step 3
This is kinda step 3 and 4... I just took the screen shot too late.
What I do here is go in and add highlights on the face to show feature and to just roughly get myself acquainted with it.
This is all done VERY loosely, and no attention to detail, you are just laying down colours here. I do not use white to show highlights, I generally get the lightest colour I can without going all the way to white so that the face doesn't look reflective instead of skin-like.

Step 4
After I get the highlights, move into the shadows to compliment the highlights. I start putting shadows in the eye sockets to define the eyes more, and at the bottom of the nose to give it depth.
I will also do the lips here too... but mainly just values, no real lip colour yet. I'm just working with the shadows.

Step 5
When I feel the shadows have gotten to a point where I like them, I start pushing the shadows and lights around and start defining areas a bit.
If you look in the lower part of the example to the right, notice the crease coming from the nostril down the cheek. This is what I mean by defining slightly. Also by they eyes, I start putting in the definition of the eye lids.
Once the face kinda looks like a face without eyes, I put the eye colour in. I never use white, but I do use a light shade of gray. Then I add blue and red to it, with maybe a tinge of yellow.

Step 6
Ah, the eye is almost complete. I defined the inside of the eye with the colour and made it look like and eye.
At this point I usually start tightening up a bit and moving in to smaller areas to get them looking better. When you start out loosely, it will give you a rough layout of what you are going to do, and it makes it easier once you want to start getting into details.

Step 7
I did the eye on the other side now, and the face is looking more human like now. The face may seem a bit flat however, so you may need to start refining the form.
I went in with this guy and put some purple shadows (not black) in areas that I thought needed it. Some areas that you may find need it will be the underside of the cheeks, above the eyes, the sides of the nose, sides of forehead, underneath the lower lip, etc.
this will look goofy when you do it, but relax, the purple will end up being just and effect after long.

Step 8
See? what I did was to go in and sample a colour from around the purple and go over it at a very light opacity ( around 3 or 5). then after you do that, sample the colour (if you are using the airbrush, press alt/option and click) and start painting over it.
I repeat this multiple times in multiple areas of the shadow to blend the purple in.
Get this to a point where the skin is looking more lifelike and move on...

Step 9
Further work is then done with the shadows. I add some more purples and a little deep red to really push back the dark areas.
I now am starting to hone in on specific areas, like the space between the eyes and nose.

Step 10
eye brows! although eyebrows supposedly don't show beauty (as said by the masters of art - why Mona Lisa has very faint eyebrows) you gotta put them on there if you want your face to look masculine.
You can do SO much with eyebrows. If you angle them a certain way, the ENTIRE mood of the face will change drastically. Take your time and find the perfect eyebrow angle, it could make or break your face.

Step 11
More details, start refining the eyes, lips, and defining areas.

Step 12
even more detailing. By this time I have moved down from using a very large brush to almost using the smallest brush to refine areas that need it. I really start bringing out the upper lip and areas of the cheeks now. The forehead is also given some details by adding bumps and creases.

Step 13
Almost finished... just have to add the hair. I usually always add the hair after I have already done the top of the head. I find it is easier this way.
After I do the hair, I check and make sure there aren't any other areas I want to define further. If there are, I do it with tiny brushes and at low opacity.

This here is the finished face on the model. It turned out quite nicely I think
One thing to remember is that males and females have MUCH different facial features. The structure is the same - eye sockets, noses, etc, but the quality of the skin is what differs.

If you have trouble doing male or female faces, look at some. Find some pictures online and study them. Use your friends- ask them to model for you. Use pictures, or hell you can even use a mirror.
If you really want to make convincing faces, study what you want to do first by looking at faces... then tackle the face.
Happy skinning,
Moose

