Brushed metal effects
Created by : Redlemons
Tutorial copied with the friendly permission from Identity Crisis .
Introduction
Metal. It's a staple in every single video game ever created. If it's not clearly on-screen, then it's implied. Here I'll show you how to create it and a few nifty things you can do to make it look original.
Step 1. Make a grey base
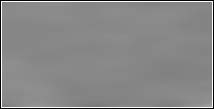
The first step and the easiest. Create a new image and fill it with a medium grey color. Use a combination of Gaussian Blur, Add Noise, Smudge and the Clouds filters (if you have them) to create an image like the one on the left. This it to add a bit of variety to the image and not make it totally grey.
Step 2. Add some noise
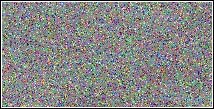
Now add some more noise and make the image grey scale. You will have to increase the colors to 16 million colors (24bit) again straight after this step.
Step 3. Smudge it
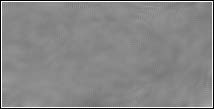
Smudge the metal around a bit with the Gaussian Blur and Smudge tools to make it a bit less rough.
Step 4. Copy & Paste
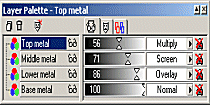
Copy the bottom layer (the one you have been working with). Now create a few more layers (the exact number is up to you, for this example I used 3) and paste the bottom layer into these other ones. You will end up with a few layers containing all the same information. Add a motion blur of around 45 degrees for one layer. Make its strength around 10 or so.
Step 5. Blend modes and opacity
This is where the metal effect really begins to look good. Play around with blend modes and the opacity for all of these layers until you get a good effect. For this example I used the multiply, screen and overlay blend modes the most but it's up to you. Remember, you aren't limited to only three layers, either. Add as many as you want and use all the motion blur, sharpen and clouds filters you want. When you've got the effect you want, flatten the image.
Step 6. Metal is never totally grey
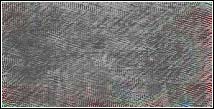
Metal always has some color to it, no matter how faint it is. I chose a blue color for this tutorial. Colorize the image or create a new layer, fill it with a color and use the Hard Light, Soft Light and Overlay blend modes to achieve a good effect. Don't worry about the color being the same saturation throughout the whole image, the next step will deal with that.
Step 7. Monkeys at your disposal
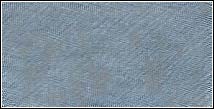
No, I didn't use the wrong picture here. Find a picture of absolutely anything you happen to have on your hard disk. It's best if the photograph is a pretty colorful photo with no large patches of the same color. The monkey picture did have a lot of black, but it worked well enough. Create a new layer and name it 'Photograph' or something similar. Paste the photo onto this new layer and change its blend mode to Hue. Mess with the opacity so you can't actually see the photo, but you can see the difference in the hue of the metal. If you're happy with this effect, flatten the image and save it. If not, repeat this step with a different photographs until you're happy with the result.
Step 8. And the rest
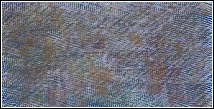
This is what I eventually came up with by using the monkey photo and a photo of a house. The reason to do use the photos is to get slight variations in color and saturation and give the metal a more weathered feel.
Final image
Conclusion
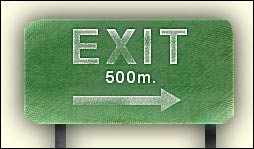
So, there you have it. Metal can be a very easy effect to create, as long as you know the tricks. Don't immediately rush to your nearest free texture website or your digital camera, because doing it yourself is so much more rewarding, as well as original. It's very disappointing to see another skin or artwork use the same materials that you did.
Created by : Redlemons
Tutorial copied with the friendly permission from Identity Crisis .
Introduction
Metal. It's a staple in every single video game ever created. If it's not clearly on-screen, then it's implied. Here I'll show you how to create it and a few nifty things you can do to make it look original.
Step 1. Make a grey base
The first step and the easiest. Create a new image and fill it with a medium grey color. Use a combination of Gaussian Blur, Add Noise, Smudge and the Clouds filters (if you have them) to create an image like the one on the left. This it to add a bit of variety to the image and not make it totally grey.

Step 2. Add some noise
Now add some more noise and make the image grey scale. You will have to increase the colors to 16 million colors (24bit) again straight after this step.

Step 3. Smudge it
Smudge the metal around a bit with the Gaussian Blur and Smudge tools to make it a bit less rough.

Step 4. Copy & Paste
Copy the bottom layer (the one you have been working with). Now create a few more layers (the exact number is up to you, for this example I used 3) and paste the bottom layer into these other ones. You will end up with a few layers containing all the same information. Add a motion blur of around 45 degrees for one layer. Make its strength around 10 or so.

Step 5. Blend modes and opacity
This is where the metal effect really begins to look good. Play around with blend modes and the opacity for all of these layers until you get a good effect. For this example I used the multiply, screen and overlay blend modes the most but it's up to you. Remember, you aren't limited to only three layers, either. Add as many as you want and use all the motion blur, sharpen and clouds filters you want. When you've got the effect you want, flatten the image.

Step 6. Metal is never totally grey
Metal always has some color to it, no matter how faint it is. I chose a blue color for this tutorial. Colorize the image or create a new layer, fill it with a color and use the Hard Light, Soft Light and Overlay blend modes to achieve a good effect. Don't worry about the color being the same saturation throughout the whole image, the next step will deal with that.

Step 7. Monkeys at your disposal
No, I didn't use the wrong picture here. Find a picture of absolutely anything you happen to have on your hard disk. It's best if the photograph is a pretty colorful photo with no large patches of the same color. The monkey picture did have a lot of black, but it worked well enough. Create a new layer and name it 'Photograph' or something similar. Paste the photo onto this new layer and change its blend mode to Hue. Mess with the opacity so you can't actually see the photo, but you can see the difference in the hue of the metal. If you're happy with this effect, flatten the image and save it. If not, repeat this step with a different photographs until you're happy with the result.
Step 8. And the rest
This is what I eventually came up with by using the monkey photo and a photo of a house. The reason to do use the photos is to get slight variations in color and saturation and give the metal a more weathered feel.

Final image

Conclusion
So, there you have it. Metal can be a very easy effect to create, as long as you know the tricks. Don't immediately rush to your nearest free texture website or your digital camera, because doing it yourself is so much more rewarding, as well as original. It's very disappointing to see another skin or artwork use the same materials that you did.
Last edited:

