
Metal (Bang your head!)
Tutorial copied with the friendly permission from Identity Crisis .
Welcome to another instalment of Moose's tips! heh, yeah. This time I will give you pointers on how to make some beaten looking metal instead of having shiny, nice looking clean stuff. (Your character kills right? hell he/she/it should be a little dirty)
Step 1
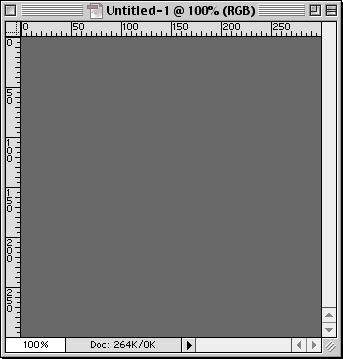
Before I start, I will lay down the middle value I want in the image. For metal textures, I always start in gray (blacks and whites) then work to colour for the texture of the metal.
There isn't too much to this step. Just a simple fill")
Step 2
Now I go in and do the shape of the metal. Get the metal shaded and highlighted exactly how you want it. Here, I just wanted a simple sphere so that's what I did. When you do Chest armour and other stuff, make sure all of your highlights and shadows are in and perfect before you move on to the next step.
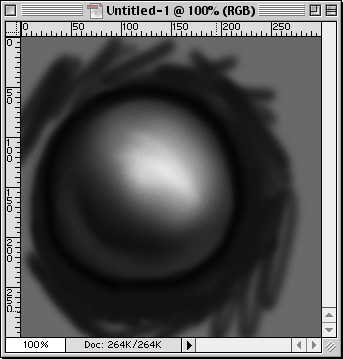
This is important that your metal has the shape you want it before you move on, because after this step it is very hard to come back and reform the metal without having to redo step 3.
do not use burn and dodge tools to do this, instead I use just black and white airbrushes (anti- aliased ones : they are the brushes with soft edges).
You can use burn and dodge, but I think you have better control over the lights and darks if you use the airbrush at low pressure.
Step 3
After your metal piece is exactly how you want it, you move to this step.
What you are doing here, is making the metal seem like it is brushed and has scratches.
To do this, get the burn and dodge tool (press O in photoshop) at a medium opacity and set on highlights, and a very small brush size.
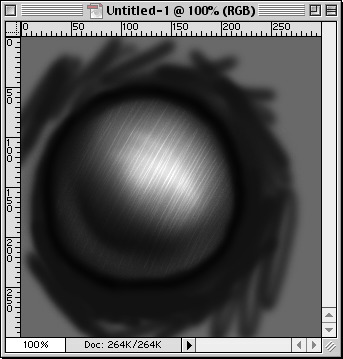
Then all you have to do is go crazy. Start just moving all over your surface back and forth and back and forth. Continue this until you have reached a point where you like it. Check this out too see the final scratches.
Step 5
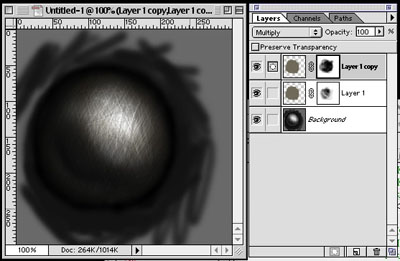
After all the scratches are added, I move on to add colour to the metal to give it a little "grime."
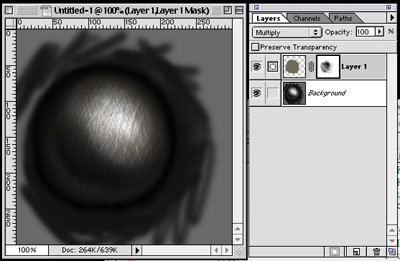
I usually will work with lowly saturated colours with the layer set to multiply. If you have never worked with layer blending modes before, they are right next to the opacity area in the layers pallete (see example to right.)
Once the colour is down, I do not leave it as a solid colour, because it looks too fake. To remedy this, I use the quick layer masks. To make one of these, click on the button next to the new layer button at the bottom of the layers pallete (it looks like a box with a circle in it).
Then, you have to click on the box next to the colour icon. If you have never worked with these masks before, here is how they work. It is kinda like erasing... but you don't ever remove any actual colour. You can only paint with black and white on a mask, and whatever you paint with black with "erase" and white will show up. Values of gray will allow transparency. Work with the airbrush at a very low pressure and watch the results.
Step 6
Duplicate the last layer you made (the colour one with the mask) and work the same mask further. This adds some more depth.
You can leave that layer at multiply, or you can switch it to another blending mode. I think 2 multiply work best though.
Step 7
Then another layer of colour is added, I chose to use some red... don't ask me why, I just did
This is the same thing as the previous colours, change the blending mode and then work the mask until it looks cool.
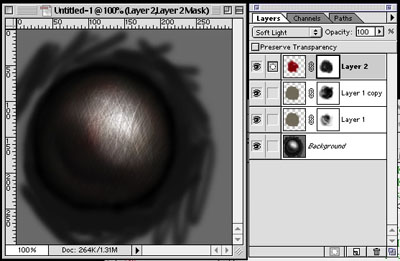
You can add more colours and more masked layers here too... don't feel limited.
Step 8
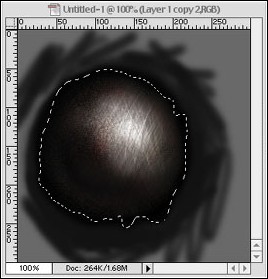
Now you really start getting more texture. Duplicate one of the first colours you made, and Control + Click (Command +Click on Mac) the layer to select everything in that layer (position the duplicated layer as shown). Then go to Filter >Noise > Add noise.

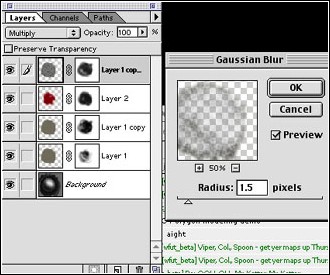
Step 9
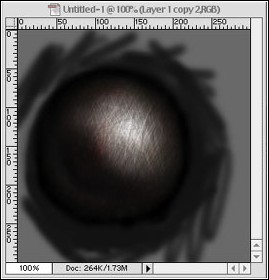
Blur the noise you just made so it creates more of a feel rather than a garble of stuff. Use the gaussian blur (Filter > Blur > Gaussian Blur) at a low level. Change this layer to something like Colour Dodge in the layer blending modes. Play with the mask then... you will get a cool highlight effect.
Step 10
I duplicated one of the first layers one more time, and added very little noise to the last one. Now, I'm not really sure why I don't have the last layer invisible, but it should be visible
You don't have to use the same colours I did in this tut, you don't even have to use colour. You can use black and white again and again and it will look just the same. The important part to remember is the noise. It may be a generally over looked filter, but it is very useful.
End.
Tutorial copied with the friendly permission from Identity Crisis .
Welcome to another instalment of Moose's tips! heh, yeah. This time I will give you pointers on how to make some beaten looking metal instead of having shiny, nice looking clean stuff. (Your character kills right? hell he/she/it should be a little dirty)
Step 1
Before I start, I will lay down the middle value I want in the image. For metal textures, I always start in gray (blacks and whites) then work to colour for the texture of the metal.
There isn't too much to this step. Just a simple fill
Step 2
Now I go in and do the shape of the metal. Get the metal shaded and highlighted exactly how you want it. Here, I just wanted a simple sphere so that's what I did. When you do Chest armour and other stuff, make sure all of your highlights and shadows are in and perfect before you move on to the next step.
This is important that your metal has the shape you want it before you move on, because after this step it is very hard to come back and reform the metal without having to redo step 3.
do not use burn and dodge tools to do this, instead I use just black and white airbrushes (anti- aliased ones : they are the brushes with soft edges).
You can use burn and dodge, but I think you have better control over the lights and darks if you use the airbrush at low pressure.
Step 3
After your metal piece is exactly how you want it, you move to this step.
What you are doing here, is making the metal seem like it is brushed and has scratches.
To do this, get the burn and dodge tool (press O in photoshop) at a medium opacity and set on highlights, and a very small brush size.
Then all you have to do is go crazy. Start just moving all over your surface back and forth and back and forth. Continue this until you have reached a point where you like it. Check this out too see the final scratches.
Step 5
After all the scratches are added, I move on to add colour to the metal to give it a little "grime."
I usually will work with lowly saturated colours with the layer set to multiply. If you have never worked with layer blending modes before, they are right next to the opacity area in the layers pallete (see example to right.)
Once the colour is down, I do not leave it as a solid colour, because it looks too fake. To remedy this, I use the quick layer masks. To make one of these, click on the button next to the new layer button at the bottom of the layers pallete (it looks like a box with a circle in it).
Then, you have to click on the box next to the colour icon. If you have never worked with these masks before, here is how they work. It is kinda like erasing... but you don't ever remove any actual colour. You can only paint with black and white on a mask, and whatever you paint with black with "erase" and white will show up. Values of gray will allow transparency. Work with the airbrush at a very low pressure and watch the results.
Step 6
Duplicate the last layer you made (the colour one with the mask) and work the same mask further. This adds some more depth.
You can leave that layer at multiply, or you can switch it to another blending mode. I think 2 multiply work best though.
Step 7
Then another layer of colour is added, I chose to use some red... don't ask me why, I just did
This is the same thing as the previous colours, change the blending mode and then work the mask until it looks cool.
You can add more colours and more masked layers here too... don't feel limited.
Step 8
Now you really start getting more texture. Duplicate one of the first colours you made, and Control + Click (Command +Click on Mac) the layer to select everything in that layer (position the duplicated layer as shown). Then go to Filter >Noise > Add noise.
Step 9
Blur the noise you just made so it creates more of a feel rather than a garble of stuff. Use the gaussian blur (Filter > Blur > Gaussian Blur) at a low level. Change this layer to something like Colour Dodge in the layer blending modes. Play with the mask then... you will get a cool highlight effect.
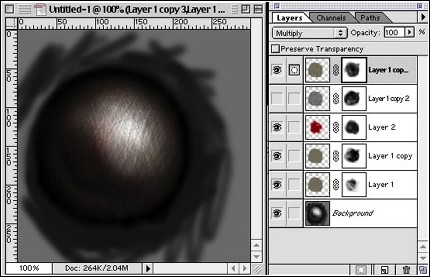
Step 10
I duplicated one of the first layers one more time, and added very little noise to the last one. Now, I'm not really sure why I don't have the last layer invisible, but it should be visible
You don't have to use the same colours I did in this tut, you don't even have to use colour. You can use black and white again and again and it will look just the same. The important part to remember is the noise. It may be a generally over looked filter, but it is very useful.
End.
Last edited: