
Realistic blood splatters
Created by Redlemons .
Tutorial copied with the friendly permission from Identity Crisis .
Introduction :
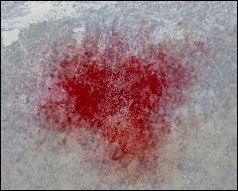
It's a given that almost every game created nowadays involves masses of blood and guts flying around on your screen. So, creating a skin or map or even a piece of art for a game like UT/Quake looks almost out of place without blood. Don't get me wrong, blood isn't a must, and nor does it guarantee a good creation, but sometimes you need it for whatever reason. Read ahead to find out how to make this:
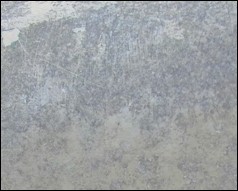
First of all you're going to need a base texture. In this example I've used a pretty standard photograph of a piece of rusted metal, touched up a little to suit this tutorial. So, you can either do the same, and get your hands on some metal, create your own metal texture, or even use another material like fabric, skin or plastic - they all work fine. Finally, you can right-click on the image below and use it yourself.
Next you'll need to create a new layer and call it 'Blood', or at least a name you'll understand. At the moment it's best if you keep the Blend Mode on normal.
Next, choose a good red colour. Check the colour palette in your paint program and choose one, or even use the colours below. It's best if you use the first, third or fourth (left to right) but the others can all give good effects.

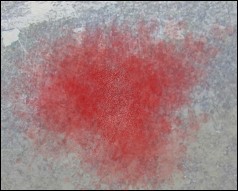
Now open the paint brush tool options and set Size to 50, Opacity to 15, Hardness to 0, Step to 25 and Density to about 70. These are the values I used for this example but its best if you play around with all the values to get an interesting blood splatter. Paint this on however you like and don't worry about the colour at the moment - it'll probably look too bright or cartoonish but that will be fixed in the next step.
Now open up the Layer Palette again and choose Burn as the blend mode. You'll notice the blood suddenly turn darker and some of it disappear completely. Now that you know what the blood will look like you can easily get the paintbrush out again and add to the splatter, or erase parts you don't like.

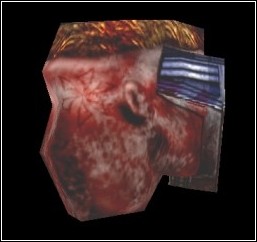
As I said before, this blood splatter works on almost any type of surface. You can even get the smudge tool out or use the motion blur option to get some interesting drips happening. I used this method a lot when working on one of my skin for Visor as you can see in the image below.
Created by Redlemons .
Tutorial copied with the friendly permission from Identity Crisis .
Introduction :
It's a given that almost every game created nowadays involves masses of blood and guts flying around on your screen. So, creating a skin or map or even a piece of art for a game like UT/Quake looks almost out of place without blood. Don't get me wrong, blood isn't a must, and nor does it guarantee a good creation, but sometimes you need it for whatever reason. Read ahead to find out how to make this:
First of all you're going to need a base texture. In this example I've used a pretty standard photograph of a piece of rusted metal, touched up a little to suit this tutorial. So, you can either do the same, and get your hands on some metal, create your own metal texture, or even use another material like fabric, skin or plastic - they all work fine. Finally, you can right-click on the image below and use it yourself.
Next you'll need to create a new layer and call it 'Blood', or at least a name you'll understand. At the moment it's best if you keep the Blend Mode on normal.
Next, choose a good red colour. Check the colour palette in your paint program and choose one, or even use the colours below. It's best if you use the first, third or fourth (left to right) but the others can all give good effects.
Now open the paint brush tool options and set Size to 50, Opacity to 15, Hardness to 0, Step to 25 and Density to about 70. These are the values I used for this example but its best if you play around with all the values to get an interesting blood splatter. Paint this on however you like and don't worry about the colour at the moment - it'll probably look too bright or cartoonish but that will be fixed in the next step.
Now open up the Layer Palette again and choose Burn as the blend mode. You'll notice the blood suddenly turn darker and some of it disappear completely. Now that you know what the blood will look like you can easily get the paintbrush out again and add to the splatter, or erase parts you don't like.
As I said before, this blood splatter works on almost any type of surface. You can even get the smudge tool out or use the motion blur option to get some interesting drips happening. I used this method a lot when working on one of my skin for Visor as you can see in the image below.
Last edited: